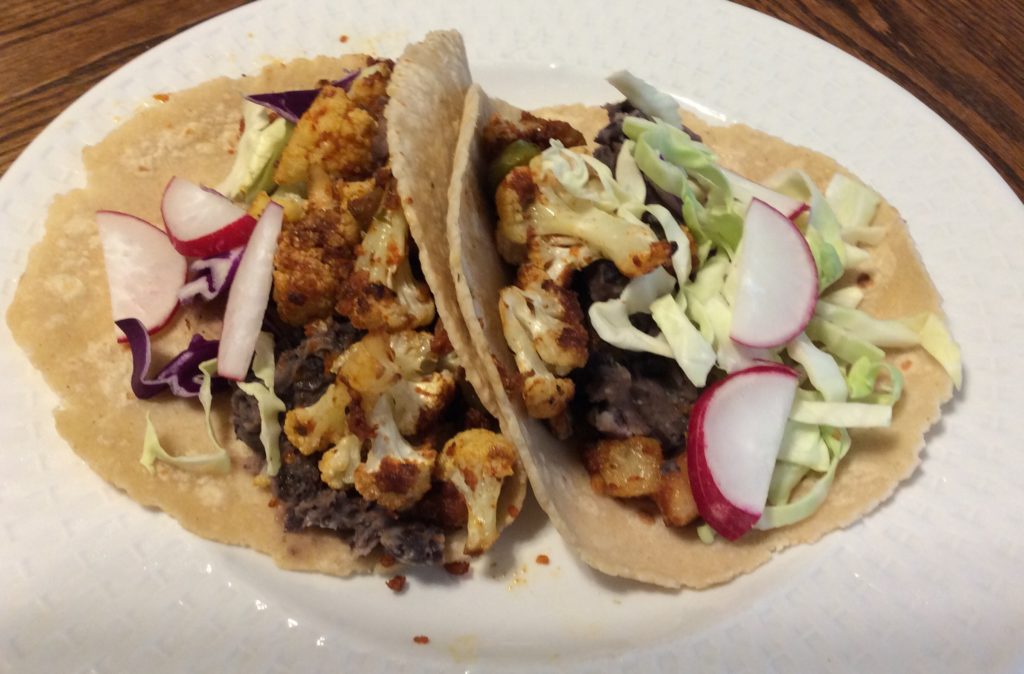
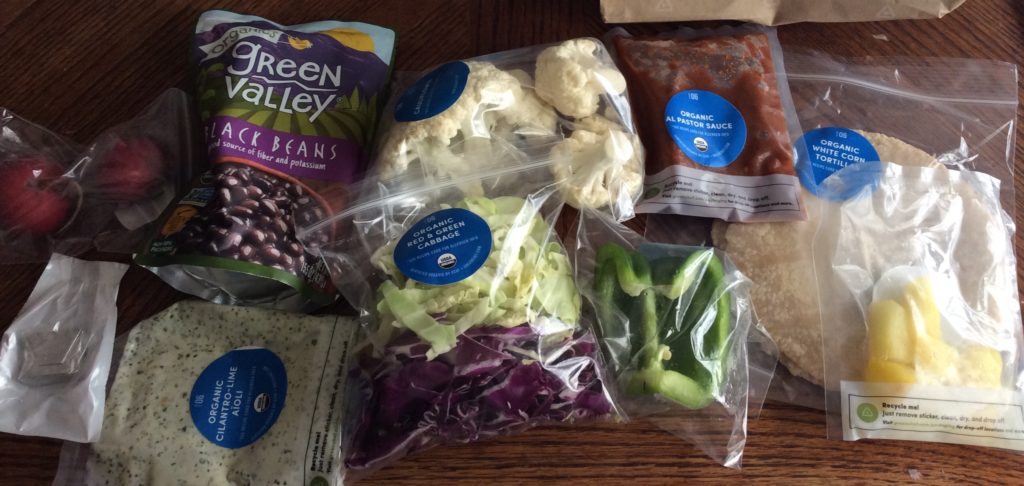
The key to the dish is the sauce, of course, so I imagine I’ll have to experiment and find one that my daughter might like. Safeway has a pineapple peach salsa that might fit the bill. The cauliflower for these tacos is basically sauteed for 3-4 minutes with green pepper (which she didn’t like so I’ll omit next time), you then add some cubed pineapple, 1/4 cup of water and the al pastor sauce, and put it in a 400F oven for 15 minutes.
This kit also taught me how to make mashed black beans – you put the canned beans in a pot with a little bit of water and a teaspoon of vegetable stock concentrate, cook it for five minutes and then mashed.
The cabbage in the kit was supposed to be mixed with a cilantro aioli, but this wasn’t vegan, so I had to skip it. The cabbage was sort of blah on its own, but it added some crunch to the tacos.
Again, all in all she liked them and she wants me to make them again.
And I will, because I’m certainly not going to pay $26 to make this meal. I paid $10 with a promo, and for that it was a bargain.
I’m getting bored writing reviews of meal kits, but I want to at least finish this project. After trying Green Chef this week, I only have one more meal kit company to try (Marley Spoon), and then I’ll be ready to give my final verdict as to which is the best Meal Kit company. But I’ll give you a hint: it’s not Green Chef. You’ll have to wait until my review of the company to hear why, however.
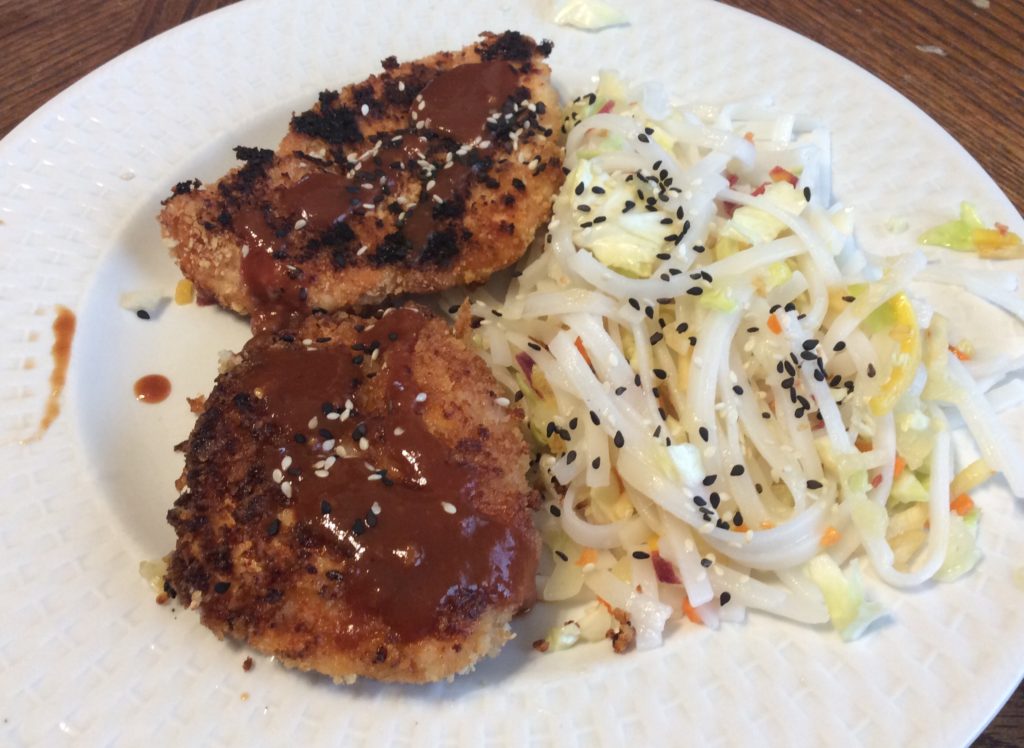
First, as the cook, I really resented all the needless preparation. The cabbage, pineapple and pickled ginger had already been processed and cut into strips or cubed – and yet I was told to chop them. Why not go all the way and send them chopped? Most annoyingly, the instructions asked that I cut the chicken breasts horizontally into two thin cutlets. That’s the sort of task that requires sharp knives and knife skills. I did a fairly good job of it, but it shouldn’t be left to the home cook to do this preparation.
I did enjoy the chicken, however. The chicken cutlets were dipped in tonkatsu sauce, breaded with panko crumbs, sauteed on both sides for 3 minutes and then cooked in the oven for 6 more. I really would like to know why I couldn’t just finish the whole thing on the stove (I hate having to preheat the oven), so Green Chef fails for not explaining this. But my daughter really liked the chicken and it looks like the sauce is available commercially and it’s also fairly easy to make.
The noodle salad, OTOH, was a disappointment. It lacked flavor and none of us liked it.
I also wasn’t thrilled that the meal didn’t have any exotic ingredients. At this price point, I expect it to include things I can’t easily get at my supermarket. In all fairness, it did have some very cool looking black & white sesame seeds – but that was just for show – and it did include pickled ginger in the salad, but the salad sucked.
This meal kit had 580 calories per serving. It was on the small side and I was left hungry (but then again, I didn’t want to eat the salad).
The regular price for this meal kit is ~$26. I paid $10 with a discount, and really, I wouldn’t pay more than that.
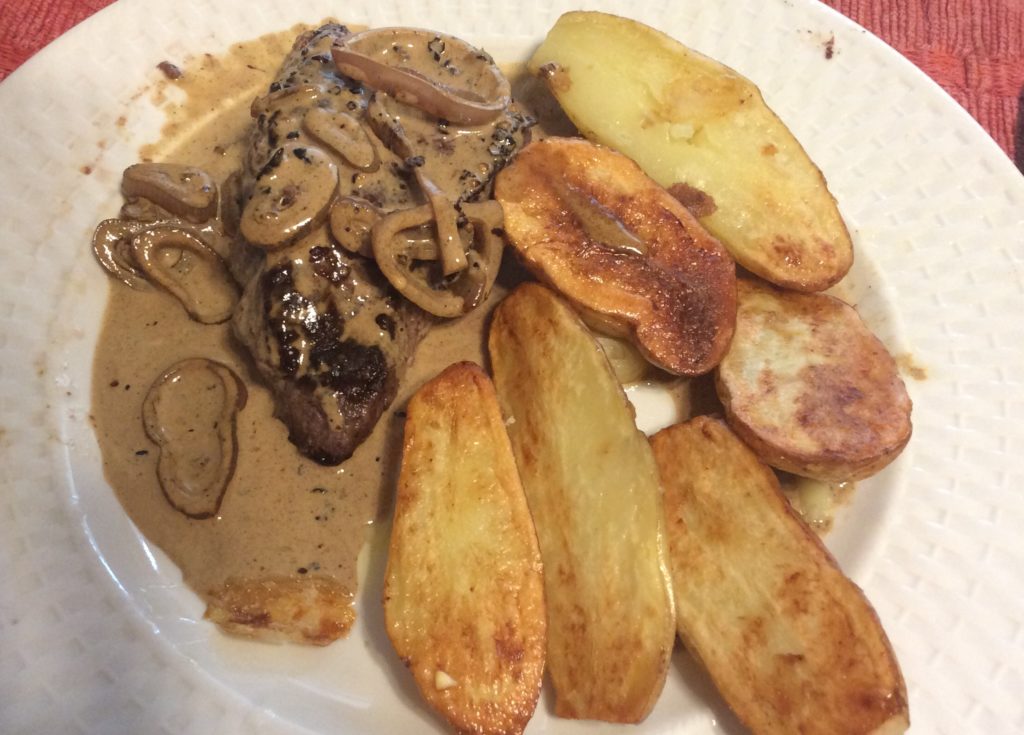
The steak, sirloin, was fine but unexciting. The potatoes were blah – I mean, good, but just potatoes. But the sauce was very good and therefore, so was everything else.
The dish also included creamed kale. I wasn’t going to eat it, so I didn’t bother making it.
But this kit was another winner.
I paid around $16/$8 for this kit/per serving. Again, I thought it was worth it.
Sauce au Poivre
This sauce is to be served with steaks. I’ve doubled the quantities but it will probably still serve 2.
2 tsp olive oil
1 tsp cracked black peppercorns
1 shallot, chopped
1/2 cup white wine
1/2 cup heavy cream
4 tsp Dijon mustard
Add olive oil to pan where steaks were cooked and heat over medium heat. Add peppercorns and shallot and cook, stirring, for 2-3 minutes, until the shallot starts to soften. Add wine and cook for 1-2 minutes, scrapping up the brown bits from the bottom of the pan. Add the cream and mustard, stir and cook for an additional 30 seconds.
I had no reason whatsoever to make this meal kit hack other than the fact that I’m enjoying hacking meal kit recipes and blogging about it. Hey, we all have our weird hobbies.
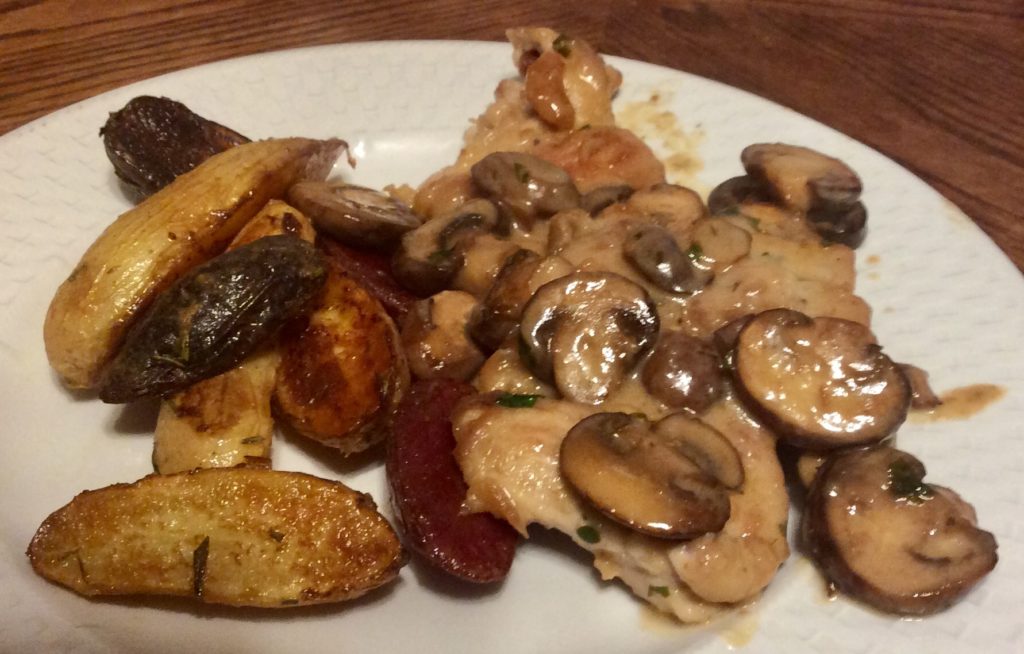
I did, mind you, need to use the rest of the skinless/boneless chicken thighs my husband got me by mistake a few days ago (the first half I used to make this meal hack) and I love Chicken Marsala, but I could have gone with my usual recipe – which is absolutely delicious. Granted, Plated’s recipe for Chicken Marsala is almost exactly like my own (this one doesn’t use shallots, though) – which is probably why this recipe was absolutely delicious as well.
The recipe for the chicken, that is. I did not enjoy the fingerling potatoes at all. The Dijon taste was too weird. Maybe I put too much, I had to guess how much were in the “packets” and “containers” that went with the kits, but more likely it’s just not a good combination.
I did make a couple of changes to the chicken recipe, the main one was that I used Madeira instead of Marsala. I usually keep Marsala around, but apparently I had actually run out of it the last time I used it. Madeira has very similar notes to Marsala, and I figured it would produce similar results. It did! If anything, the Madeira was better than the Marsala (or maybe, this is just a better recipe than mine).
I ended up spending almost the same amount to make this dish than I would have spent buying the kit – $18.3 for me vs $24, if bought as a subscription, or $21.4, if bought at my local Safeway. As usual, I didn’t have to spend money in some ingredients that I already had at home, but had to buy larger quantities than needed of other ingredients. I think
Plated Ingredients
My Ingredients
Cost
9 oz cremini mushrooms
8 oz sliced cremini mushrooms
$3
8 oz fingerling potatoes
20 oz fingerling potatoes (used less)
$3
1/8 oz parsley
1 Tbsp parsley
home garden
1/8 oz rosemary
2 tsp rosemary
home garden
1 lemon
1 lemon
$1.10
2 boneless chicken breasts
5 boneless chicken thighs
$5.50
2 packets butter
2 Tbsp butter
pantry
1 container chicken stock
1/2 tsp chicken stock concentrate
pantry
1 packets Dijon mustard
2 Tbsp Dijon mustard
pantry
1/4 cup flour
flour
pantry
1/2 cup Marsala
1 cup Madeira
pantry
2 Tbsp heavy cream
1 qt heavy cream (used less)
$5.70
My local Safeway carries this kit often, and I would consider buying it. My big hesitation is that it comes with chicken breasts, when I really prefer thighs so much more.
Chicken Madeira
5-6 boneless, skinless chicken thighs
1/2 cup flour
salt & pepper to taste
2 Tbsp butter
8 oz cremini mushrooms, sliced
2 tsp olive oil
1 cup Madeira
1/2 cup chicken broth
1/3 cup heavy cream
2 tsp chopped parsley
juice of 1/2 lemon
Cover each chicken thigh with plastic wrap and then pound until thin. Place flour in a bowl, season with salt and pepper to taste. Flour the chicken thighs and leave aside.
Heat the butter in a large skillet over medium-high heat. Once melted, add the mushrooms, season with salt and pepper, and cook until golden, about 8 minutes, stirring frequently. Using a slotted spoon remove mushrooms to a bowl and set aside.
Add olive oil to the skillet and heat over medium-high heat. Carefully transfer the chicken thighs to the skillet and cook until done, about 4 minutes per side. Remove to a clean plate and set aside.
Add the Madeira, chicken broth and reserved mushrooms. Cook, stirring frequently, until the liquid is reduced by half, about 5 minutes. Stir in the cream, parsley and lemon juice. Reduce heat to medium and cook for 1 minutes. Return chicken to the the skillet and cook until the chicken is warmed through, about 5 minutes.
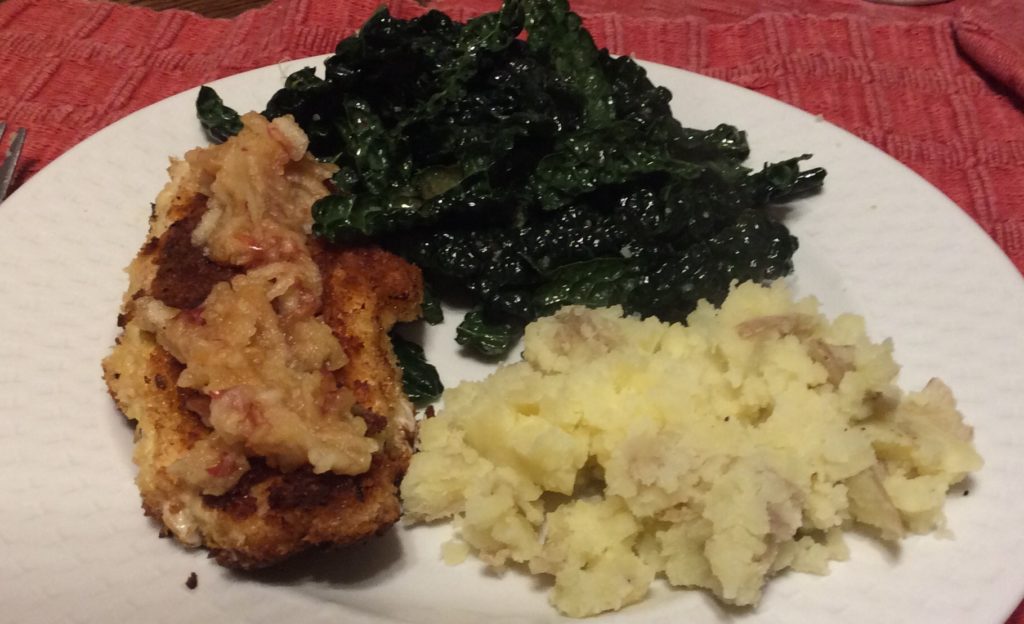
I got this meal kit for to make for Crispy Chicken Schnitzel with Mashed Potatoes & Creamy Mustard-Dressed Kale for my non-vegan daughter and me, but I ended up eating it mostly by myself: my daughter ended up with other plans. No matter, I saved the chicken breast for her for tomorrow and I’ll make her some fresh mashed potatoes with potatoes I had at home.
This is a meal that is more like disparate components than one full meal. The components all work with each other, don’t get me wrong, but you could substitute any of them for something else and the meal would still work. I’m not sure if that’s good or bad.
The chicken schnitzel itself was good – but it wasn’t really a schnitzel. The breast pieces were skinless and boneless but they had not been flattened – nor were there any instructions to flatten them. Moreover the cooking times given were for a thick piece of breast. The chicken was fine, but it would have likely been juicier and more enjoyable if it’d been flattened first. The flavor was OK, but not extraordinary given that there was no seasoning beyond salt on the breading. Commenters suggest adding onion and garlic powder to the flour, I’d also add dried oregano or fresh chopped parsley to the egg.
UPDATE: It turns out that the schnitzel part was my fault. Blue Apron had sent me boneless chicken thighs for this recipe, and the chicken breasts for another one. I didn’t look closely and just assumed both were chicken breasts and ended up using the wrong cut.
The apple slaw that accompanied the chicken was also good, but it didn’t really improve the chicken substantially. I also ended up with way too much slaw.
The mashed potatoes, which are simply mixed with olive oil and salt, were below average. The olive oil flavor was too strong. My vegan daughter didn’t like them. Personally, I think the recipe should have had you mix half the ghee with olive oil to fry the schnitzel, and use the rest of the ghee with the mashed potatoes. Commenters also suggest adding a couple of crushed garlic cloves to the potatoes.
The real star of the meal was the kale, however. It was dressed with a “creamy mustard dressing” which is just Dijon mustard and mayo, mixed with honey and salt. It was delicious – I don’t even like kale but I ate the whole thing (my daughter didn’t want to even try it, and I figured it’ll be soggy tomorrow). I’ll definitely try this dressing on other stuff (recipe below).
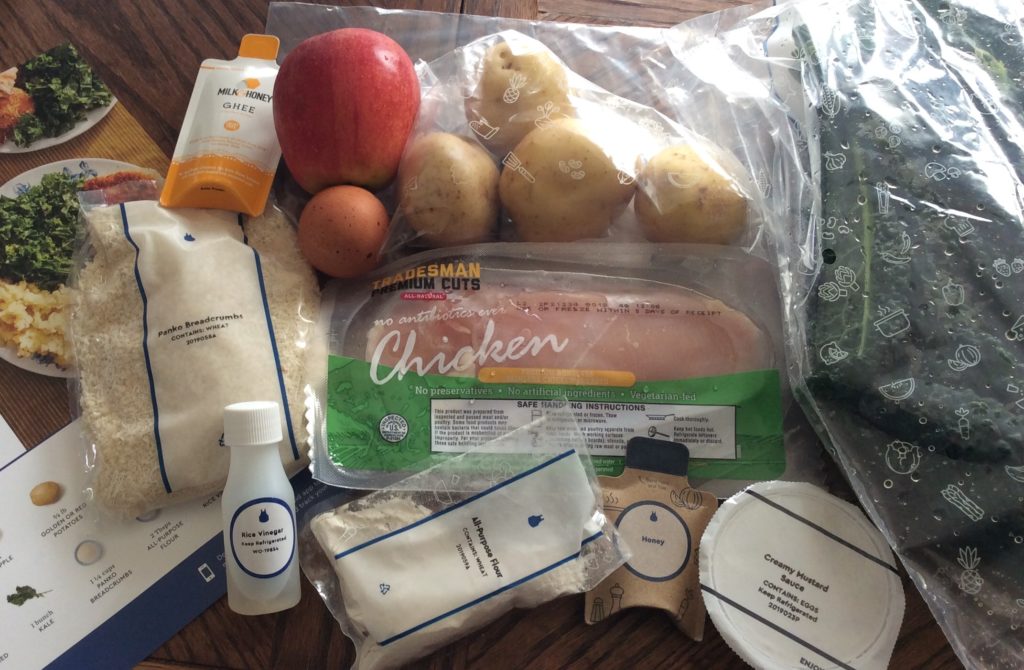
All the ingredients for this kit were there and they were fresh. I love that Blue Apron includes ghee for cooking rather than relying of you having butter at home (as HelloFresh does). And I also loved the container for the egg.
The only mild inconveniences is that it’s winter, and I don’t keep my house particularly warm, so the honey was crystalized by the time I went to use it. The ghee was also pretty hard. Don’t refrigerate either when you get them – at least in winter.
The meal was all in all satisfying – though I did eat all the kale by myself. It was also relatively quick and easy to prepare. And it’s also easy to recreate at home with your own ingredients.
I paid $12.50, or $6.25 per serving, for this kit with a sign-in promo. It was worth this but probably not the $20 regular price.
Creamy Mustard-Dressed Kale
2 oz kale or fresh baby spinach leaves
1 Tbsp. mayonnaise
1 Tbsp. honey
1 tsp. dijon mustard
salt to taste
If using Kale, remove central stem from kale leaves, then cut into strips.
in a medium bowl, whisk together the mayo, honey and mustard. Season. Add kale and mix well, using your hands to make sure all the leaves are coated.
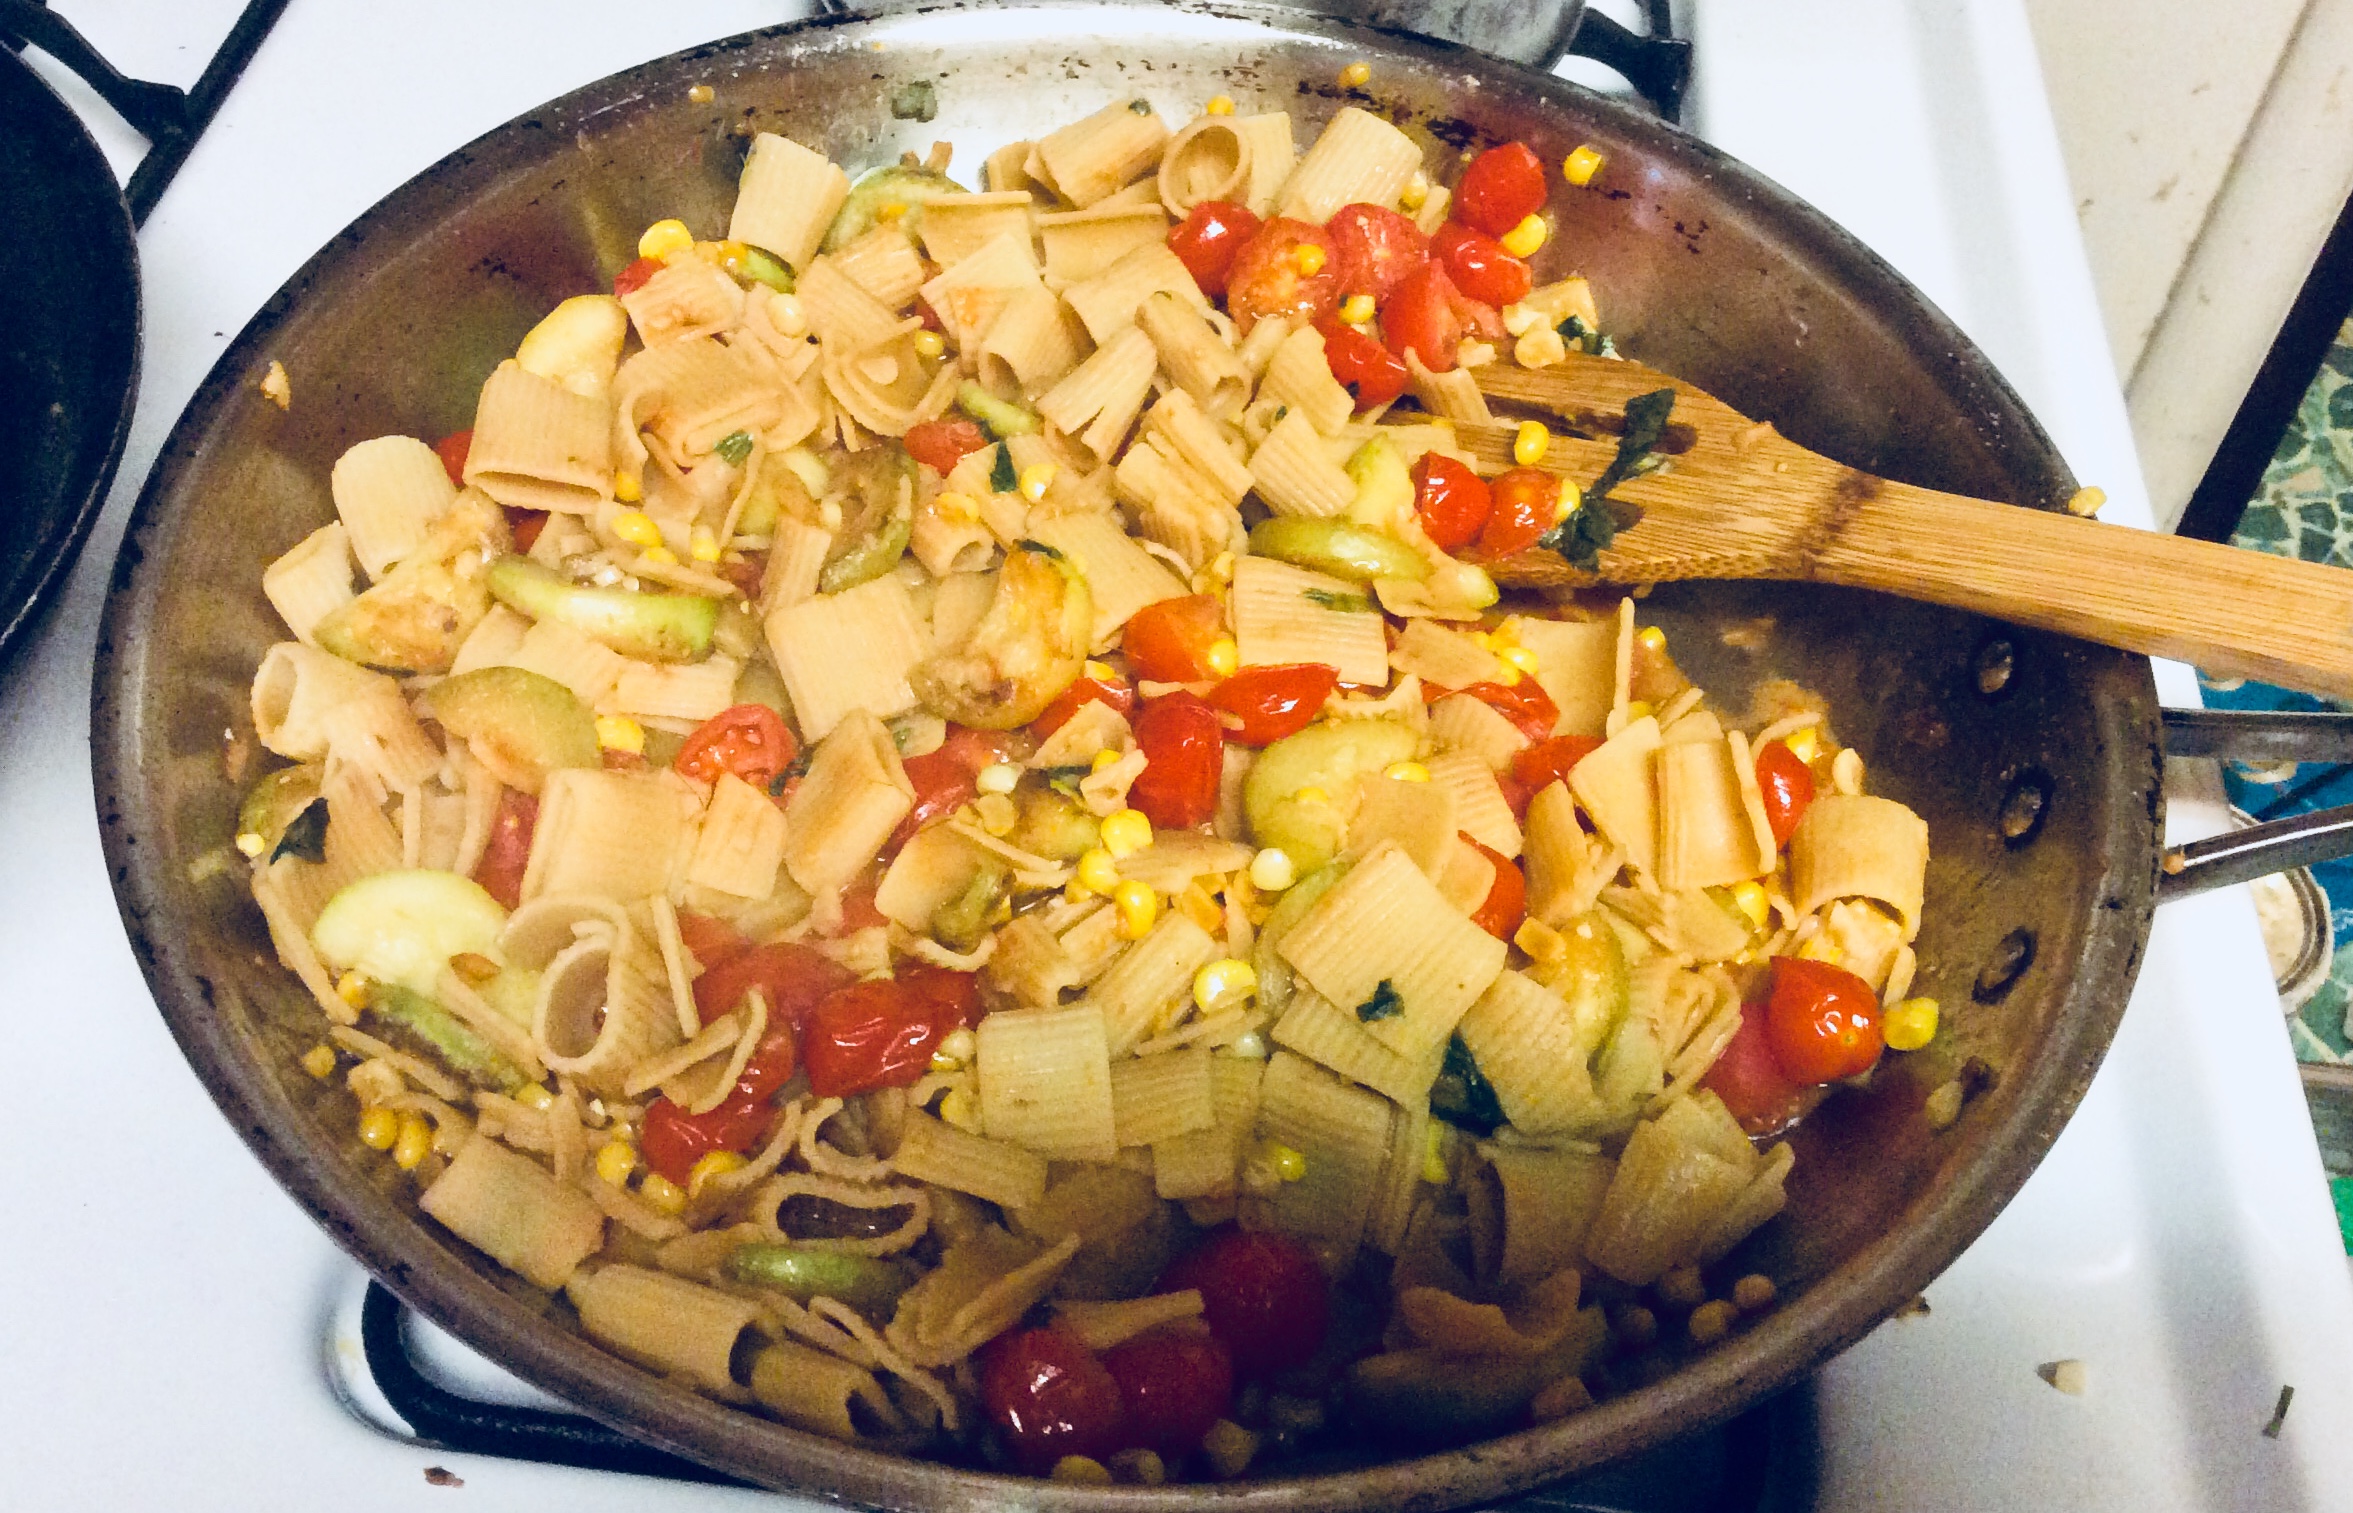
My vegan daughter is into zucchini. She only recently discovered it (i.e. was willing to give it a try) and now she can’t get enough. I made her pasta with zucchini the other day, by just winging it, but tonight I decided to actually shop for and follow a recipe. I decided on this Blue Apron recipe for Fusilli Bucati Pasta with Summer Squash, Corn, & Tomatoes because it was simple and easy to “veganize”.
I did, of course, make some changes to the recipe – as you can see by ingredient list below. Instead of fusilli, I used rigattoni pasta. I prefer to give my kids chickpea pasta, rather than wheat pasta, as it has more fiber and protein – and Grocery Outlet, my closest grocery store, didn’t have chickpea fusilli. I used more garlic and more corn than what came in the Blue Apron kit because it was so recommended by the people who commented on the recipe. I used zucchini instead of summer squash as we’re still in winter and cherry tomatoes because they were easy to find. And I used Romano/Parmesan/Asiago cheese mix because that’s what I had at home – though instead of adding it to the pan, I served it on the side. I did the same with the butter. That way, both my vegan and my non-vegan daughters were happy. Finally, I used basil instead of parsley because several reviewers said basil worked best.
My kids were very happy. My oldest daughter liked it as much as any meal kit I’d ever bought – and while the youngest didn’t like the tomatoes (she’s currently anti-tomato), she just picked them out. The kids particularly liked the corn, which added crunch and sweetness to the dish. Next time I’ll experiment with using other types of tomatoes to see what work best for both girls.
In all, I spent $9 to make this recipe – a significant saving over the $20 it would have cost if I bought it from Blue Apron. This includes the price of the ingredients I had to buy in larger quantity than needed (e.g. the pasta and corn, which they only had packaged by four cobs), but not of the items I had at home.
Blue Apron Ingredients
My Ingredients
Cost
½ lb Fusilli Bucati Pasta
½ lb chickpea rigattoni pasta
$2
2 cloves garlic
3 cloves garlic
pantry
1 ear corn
2 ears corn
$4
1 Summer Squash
1 Zucchini
$1
½ lb Heritage Globe Or Cocktail Tomatoes
10 oz cherry tomatoes
$2
¼ tsp Crushed Red Pepper Flakes
skipped
N/A
2 Tbsps Butter
2 tsp butter
pantry
2 Tbsps Grated Pecorino Cheese
Romano/Parmesan/Asiago cheese mix
pantry
1 bunch Parsley
6 basil leaves
garden
Pasta with Zucchini, Corn, & Tomatoes
This recipe feeds four, it doubles the recipe in the kit.
Ingredients
1 lb pasta of your choice
4 ears of corn
1 lb cherry tomatoes, halved
salt & pepper
2 Tbsp. olive oil
2 Zucchini, cut in 1/3″ thick half moons
6 cloves of garlic, minced
1 bunch basil leaves, coarsely chopped
butter to taste (optional)
Grated cheese to taste (optional)
Directions
Put a pot of salted water to boil. When ready, add the pasta and cook until al dente.
Meanwhile, cut corn kernels off the cob and discard cob and silks. Season halved tomatoes with salt and pepper.
Heat olive oil over medium-high heat in a large saute pan. When hot, add the zucchini slices all in one layer and fry until brown, 2-3 minutes. Season with salt and pepper. Add corn and garlic and stir fry for two minutes. Add the tomatoes, season, and stir fry for another minute. Turn down heat to low. Mix in half of the chopped basil.
Once the pasta is ready, drain, reserving 3/4 cup of cooking liquid. Add pasta to the vegetables and mix. Add the cooking liquid and cook over medium-low heat for a few minutes, or until the water boils off.
Transfer to serving plate(s) and sprinkle remaining basil on top. Served accompanied by butter and cheese.
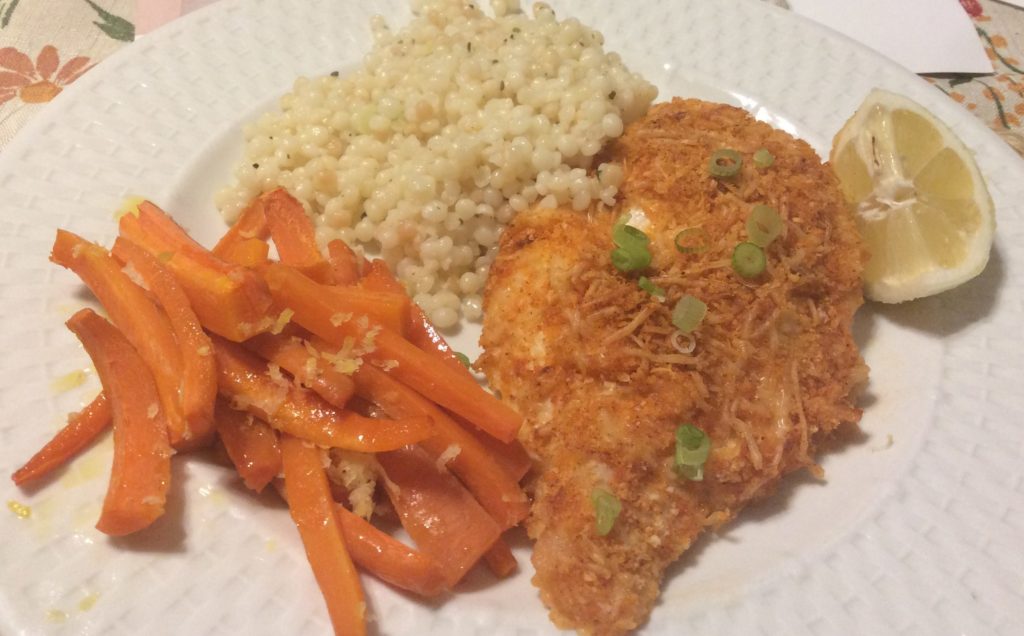
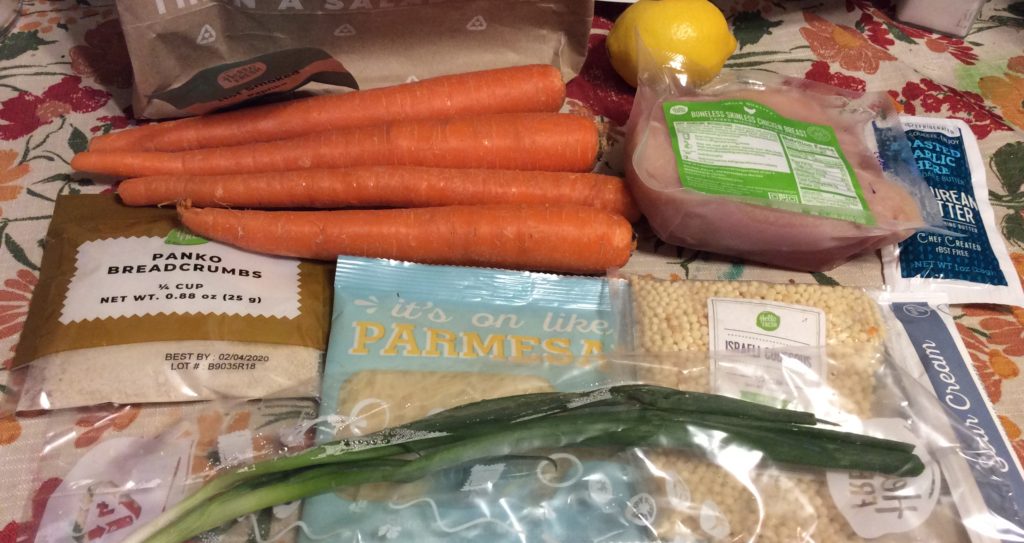
Believe it or not, in my half century in this earth, I’d never had Parmessan chicken. Indeed, I’ve never though of cheese and chicken as two ingredients that belonged together. Still, this recipe for Crispy Parmesan Chicken with Garlic Herb Couscous and Lemony Roasted Carrots sounded like something my picky younger daughter would eat – after all, the chicken looks like a chicken milanesa, and she loves milanesas.
Once again, this was a pretty simple recipe to put together and it didn’t really have any exotic ingredients (Israeli couscous was exotic once upon a time, but it’s now easily available). You can make it with ingredients easily found at the supermarket. Still, the chicken was moist and tasty – the smokiness of the paprika really came through. I quite enjoyed it.
The couscous, however, lacked flavor. It would have been better if some of the Parmessan for the chicken (there was more than enough) was used for the couscous.
I don’t like carrots, but my husband – who ate mine – thought the lemony carrots were good. All you do is roast carrot sticks for 20 minutes, with a little olive oil and salt, and then sprinkle grated lemon zest and lemon juice on them. My daughter, who also tried them, wasn’t fond of them, however.
For some reason, the recipe for the chicken called to only bread it on one side. It didn’t say why, so I breaded it on both. It was a good call.
I cooked this kit the day after I got it, and all the ingredients were fresh and I felt of good quality.
I paid $14 for this meal after a discount or $7 per serving. I think that was an appropriate price for a home cooked meal, though obviously I could put it together for less than that if I bought the ingredients myself.
The recipe for the chicken is below. While it calls for 2 chicken breasts, there was enough breading for a third one. It serves two.
Crispy Parmesan Chicken
1/4 cup panko breadcrumbs
1/4 cup fresh shredded Parmesan cheese
1 tsp smoked paprika
2 boneless, skinless chicken breasts (~6 oz each)
salt & pepper to taste
2 Tbsp sour cream
Preheat oven to 425F Line a baking sheet.
In a medium to large bowl mix together the breadcrumbs, Parmesan cheese and paprika.
Dry chicken breasts with a paper towel. Sprinkle with salt and pepper. Brush sour cream over both sides of the breasts. Transfer them one by one to the breadcrumbs bowl and press breading onto the chicken surface. Transfer them to the baking sheet and bake for 15 minutes.
“These pears are getting soft,” my daughter announced from the kitchen.
I sighed. I buy so many produce that goes bad because the child that requested it forgets about it. Indeed, I buy so much food that goes bad before anyone uses it. As it happened, at that very moment I had a two or three week old puff pastry sheet in my fridge. I’d bought a package to make mushroom empanadas for my vegan daughter and only used one sheet.
The softening pears I knew I could use – but the puff pastry? I searched online and found people asking if they could use it a few days to a week after putting it in the fridge – but two to three weeks? That seemed crazy! Still, my pastry sheets did not smell bad, they had no hint of mold in them (I do keep my fridge very cold), they were not slimy and they only had a couple of spots were they’d dried out and even then, not too much. So what the heck! I figured I’d use them.
I placed the puff pastry on a cutting board and rolled it a bit with a rolling pin. Then I transferred it to a lined cookie sheet. I sliced the pears somewhat thinly (I used the two large ones I had) and placed the pear slices on the puff pastry. I mixed some raw sugar with a bit of cinnamon, nutmeg and ginger and sprinkled it on the pears. Then I ground some almonds and sprinkled these on top.
I put the baking sheet in the fridge and turn on the oven to 400F. Once it was preheated, I put the baking sheet in the oven and baked it for about 20 minutes.
The results were great. Really, really delicious. And vegan!
My daughter had a craving for zucchini tonight (!), and I didn’t really have many ingredients to work with. So I sauted succhini slices in some olive oil with some chopped garlic (I used 2 cloves but should have used 4), cooked some chickpea pasta, and then added it to the pan. The zucchini had started to caramelized by the time I added the pasta and it was pretty sweet. I added some fresh thyme, and my daughter was quite happy with the results.
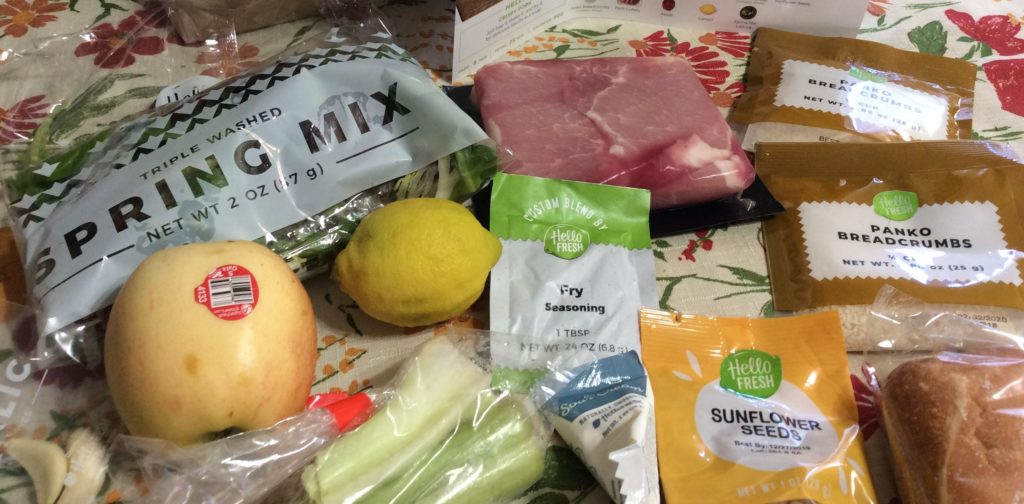
Some times the best meals are the simplest. There is nothing complicated about this HelloFresh meal of Breaded Pork Cutlets with Garlic Bread and an Apple and Sunflower Seed Salad. Nothing exotic. It can be simply put together with supermarket staples that won’t have you searching around up and down the aisles and things you already have in your pantry. And it’s very tasty and very satisfying.
All the ingredients came fresh and stayed that way, even though I cooked the meal four days after it arrived. The pork wasn’t dry and the seasoning was spot on. However, they listed the amount of kosher salt to add, but they neither included it in the kit or listed kosher salt as a needed ingredient. I didn’t have kosher salt around, so I used a smaller amount of table salt. The original recipe called for breading the pork in a plastic bag, but I used a bowl as I didn’t have a gallon ziplock bag around and I’m already using too much plastic by getting these meal kits. A bowl worked just as well.
I very much enjoyed the salad. Mine came with mixed greens – though I see HelloFresh also offers it with just arugula – and a yellow apple (golden delicious?). The dressing was olive oil and lemon juice – I’ve not been fond of this combination in other salads, but it worked here. The star of the show were the sunflower seeds, however, which added crunch and a faint sweetness to the whole thing.
I’m not giving this kit a perfect 10, however, because Hello Fresh did not include the butter needed to make the garlic bread and I didn’t have any at home. I suppose I could have looked at the list of ingredients that I needed to have at hand for this recipe before I chose it, but the whole point of meal kits is to not have to go shopping for the ingredients. Particularly in the case of this meal, where all the ingredients are so easily available, if I’m going shopping for butter, I might as well pick up the rest and cook the meal for a fraction of the cost. I understand that Hello Fresh is trying to save money by not providing the butter, but it’s still not cool.
In any case, I think oven-baked garlic bread is not a good choice for this meal. Both the pork and the salad can be put together rather quickly, but making the garlic bread requires preheating the oven, which is both a waste of energy for such a small meal, and a waste of time. Instead, they could have suggested toasting the bread in the same pan where the pork was cooked.
I’m also dinging the recipe because I was still hungry when I finished – even though I ate a lot of salad (there was plenty of it). Perhaps that’s due to not being able to make & eat the garlic bread.
After the discount, I paid $14 for this kit or $7 per serving (regular price would have been $20/kit or $10/serving).
BREADED PORK CUTLETS
1/2 cup panko breadcrumbs
3/4 tsp salt
1 tsp garlic powder
1 tsp onion powder
1 tsp paprika
4 pork cutlets
2 Tbsp sour cream
vegetable oil for frying
1/2 lemon, cut into 2 wedges
In a medium bowl, combine breadcrumbs, salt and spices. In a different bowl or plate, coat pork cutlets with sour cream (you may need to use your fingers to spread it). Transfer the cutlets to the bowl with the breadcrumbs and coat well.
Heat a 1/4″ layer of oil in a large skillet over medium-high heat. Once hot, transfer cutlets into the skillet and fry on each side, about 2-3 minutes per side. Transfer to paper towels to absorb extra oil. Serve with lemon wedges on the side to squeeze on the cutlets.
APPLE AND SUNFLOWER SEED SALAD
1 apple
1 celery stalk
2 oz spring mix
1 Tbsp olive oil
1/2 lemon
1 oz sunflower seeds
Core the apple and slice into thin slices. Thinly slice the celery.
Put apple, celery and spring mix into a medium bowl. Dress with olive oil. Squeeze the lemon half on it and mix. Add the sunflower seeds and mix again.


Recent Comments